Foto Fridays: Disney Point & Shoot Photography 101(A)
Welcome to a new blog series I will be writing on select Fridays as part of “Foto Fridays,” entitled Disney Point & Shoot Photography 101. This series will be inspired by questions I frequently receive via email and otherwise, so if you have a question or technique you’d really like to learn, by all means, ask it.
My goal for these posts is to form a catalog of information for casual point and shoot camera owners who would like to improve the pictures that they bring back from Walt Disney World without having to spend hours upon hours learning advanced techniques. To that end, I will only be posting example images that I myself have taken with a $100 point and shoot camera to illustrate the results you can realistically expect to achieve with these methods. Some of these shots may very well be sub-par, as most are from my pre-photography days, so you likely will be able to achieve better photos than the ones posted here. Regardless of camera, the old adage certainly rings true that good photography is much more about the 12 inches behind the camera rather than the camera itself, so learning these techniques certainly could prove invaluable.
This week’s lesson is going to focus on the most basic of all photography principles: composition. Quite simply, good photos require interesting composition.
When composing shots of people, and this is frequently a difficult one to remember at the Disney Parks given the great backdrops, make sure you get shots with your group as the focal point. While shots of Cinderella Castle dwarfing your family are cool to show the scale of the Castle, you also want to make sure that your family gets the limelight in at least one shot. In such a shot, it’s not even necessary to get a lot of background in the frame. Just suggesting your location might be sufficient, especially if you want your viewer’s eye to be drawn to your family.
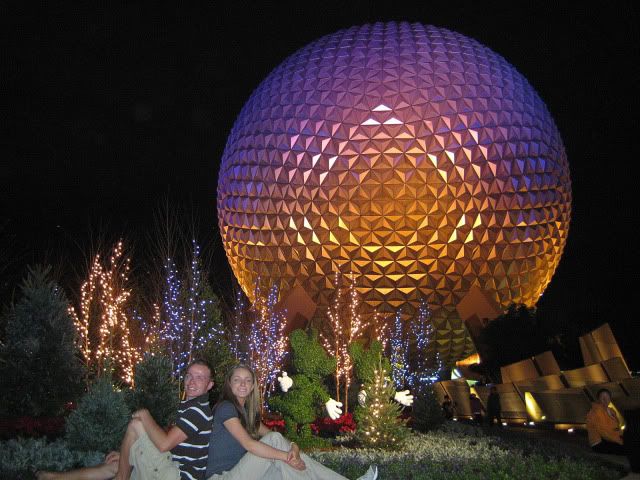
Although I like this shot, we’re definitely not the subject. If your goal is some family shots to share on social media sites or scrapbooking, you don’t want only shots like this.
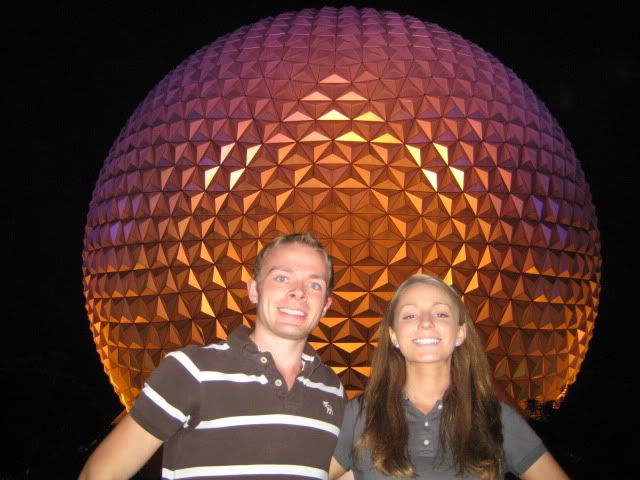
This is much more to my liking. All of the details of the SpaceShip Earth Christmas display aren’t visible, but we’re clearly in the shot, and SpaceShip Earth itself is a fairly dominant background.
For static or landscape shots, look for symmetry, repetition, and interesting lines in your subjects to help direct the eye where you want it to go within the image. The use of “leading lines” can really help to organize a shot and differentiate a garden variety snapshot from a photograph (this is a distinction that photographers have made; a snapshot is an image taken without much thought or planning to, essentially, memorialize a scene, whereas a photo is more thought out and deliberate). Similarly, framing your subject with objects in the scene can direct the viewer’s attention to the subject, when it otherwise might wander around the frame.

The water lines of Saratoga Springs direct the viewer’s eye to the closest point of the resort buildings.
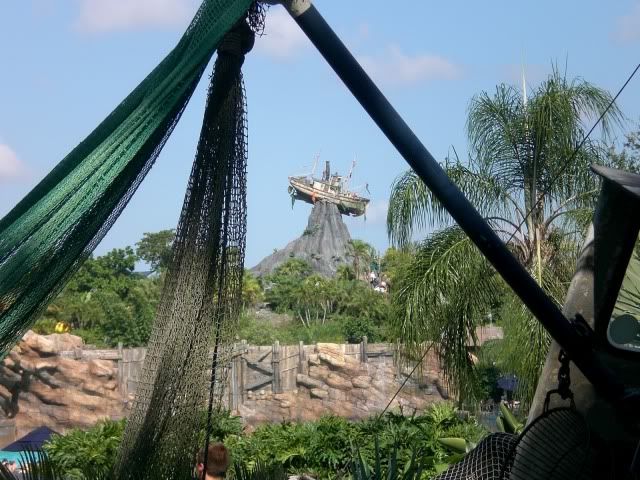
Here the wreckage of an old boat at Typhoon Lagoon cuts out dead space in the space and the bustle of the park all around and focuses the viewer on the Miss Tilly.
This might seem frustrating at first, and you have difficulty “getting it.” I certainly did. One technique that helped me when I first got into photography was turning on the grid lines on my camera’s LCD display. These grids divide the screen into 9 sections, a la the “Rule of Thirds.” While I think this so-called rule is highly overrated, the areas where these lines intersect can be helpful when first starting. Put your subject at one of the intersections or have a dominant line in the image run from one intersection to another and you’re at a good starting point. You may not always end up with the most compelling photo this way, but it’s a good way to develop your eye, and you’ll learn your personal preferences from there.

Where Donald’s feet meet his body will be near the lower right intersecting lines, and his eyes will be near the upper right intersecting lines.
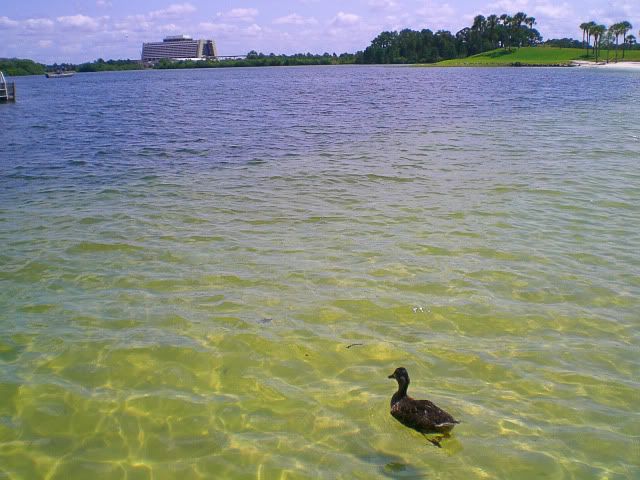
The Contemporary will be near the upper left intersection and the duck will be near the lower right intersection, creating good balance (as demonstrated here, you don’t have to place your subject at the intersections with utmost precision).
Go off center. From people in your shots, to architecture, to the horizon, try framing your subject so that it’s not in the dead center of the image. I think this is probably the single most important point to take away from the LCD grid explanation above, and one that most of us don’t follow when we first start out. There is a (seemingly) natural temptation to put dominant aspects of images right in the middle of the frame. However, the brain, eye, or whatever it is in your body that processes a photograph and determines what appeals to it, doesn’t have this same preference. I can’t really offer an explanation as to why, but that’s just the way it is. This doesn’t mean you can never center a subject; sometimes doing so is your best option, just don’t always do it.

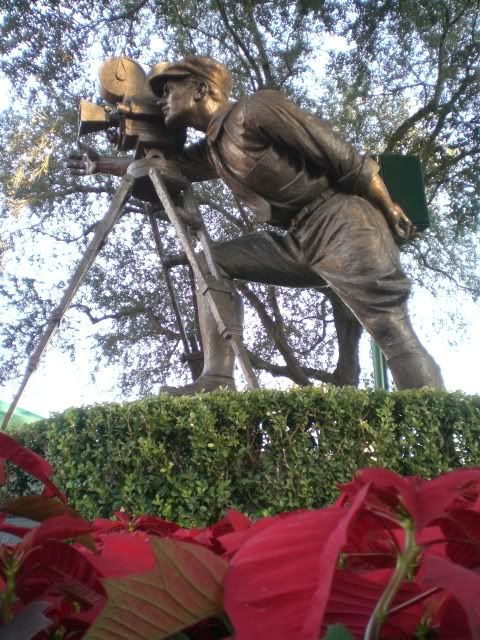
Juxtaposing my beautiful wife off-center and against these flowers in Germany makes for more interesting composition.
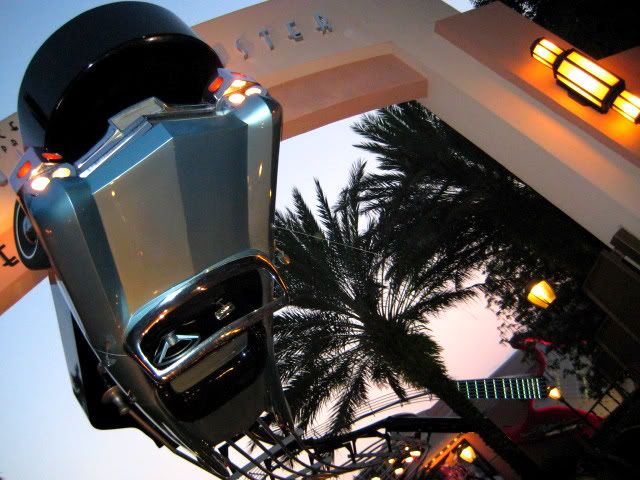
Going off-center here and using a slightly canted angle gives the viewer a sense of the “wild ride” that is Rock ‘N’ Rollercoaster.
Don’t always try to cram as much into a single shot as you can. Many times, keeping it simple is the better way to go. A good example of this, and one I made all the time, is always attempting to get shots of the entire floats when taking pictures of parades. When showing people your pictures, one hundred parade shots of complete floats isn’t going to be especially interesting, even to the most hardcore Disney fan. So when you have a really interesting subject, even if there is some “stuff” in the adjacent area that looks kind of cool, don’t be too afraid to use that isolate the main subject. I guess a corollary to this, albeit mostly unrelated to composition, is that variety is the spice of life. Take wide shots, zoom in close, mix up what you do to keep it interesting.
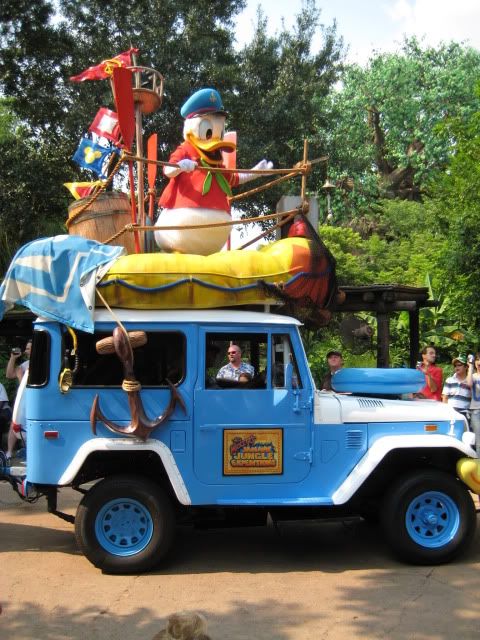
Donald’s entire float in the Jammin’ Jungle Parade. Nice for illustrative purposes.

Donald on his float in the parade. He is the “star” of the float, so why not just zoom in close on him?
I caution you now as it’s really easy, especially for a beginner, to take this advice the opposite direction and attempt to “force” interesting or unique composition. Tilting one’s camera to the side and zooming in to the point that there is no discernible subject, merely for the sake of being unique or creative are not unique or creative at all. A lot of people do these things. If you can’t explain why you’ve introduced a tilt to your shot or what the “purpose” of the abstract is, you might want to re-think it. Sometimes straight-forward is best.
Hopefully these tips have helped. This post is written more abstractly than I would like, but the rules of composition are fairly open-ended (and necessary to learn as a pre-requisite to good photography) so such is the nature of the beast. Here’s a Disney-specific composition tip that is not open ended: unless you’re doing an abstract shot, make sure not to cut off any of the top spire of the Castle. Not really a rule per se, but it’s a compositional ‘mistake’ I commonly see.
As far as compositional information, this is just the tip of the Castle (okay, that sounds admittedly dorky, but I thought using “Castle” rather than “iceberg” would be a good segue). Something to, hopefully, pique your curiosity. If you’re interested in learning more about composition, there is a wealth of online articles, as well as books. One site, WDWPhotography.com, posts multiple articles per week written by Walt Disney World photography enthusiasts. A recent book I picked up that I’ve found great for learning more about composition is The Photographer’s Eye by Michael Freeman. Both of the preceding sources are written at a slightly higher level than that at which this blog will focus, but if you’re interested in taking things to the next level, be sure to check out both. Another thing is to become active in online photo sharing sites such as Flickr. The TouringPlans group is a great place to share your pictures and find like-minded photographers who can provide constructive criticism and feedback. Lastly, and most importantly, is to get out there and take pictures.
Have any questions, topic requests, or tips of your own? Share in the comments! In the next session of Disney Point & Shoot Photography 101, I will walk through some easy steps to great point & shoot nights shots!
You May Also Like...
-

The Disney Skyliner has been a frequent conversation starter ever since it was announced back at the last D23 Expo. Love…
-

If you have a little mouseketeer, one on the way, or know someone who does, you might want to check out…
-

If you haven't quite pulled the trigger on Disney+ yet (I mean, for those of us reading this blog, how many…
-

Novelty socks haven't always ranked at the top of my must-have merchandise list. But, this impulse purchase is getting harder for…
I’m going to WDW soon with a Canon Powershot A480. I’m thinking of getting a gorillapod. Have you used one? If so, can you recommend some good sites in WDW to use it? I’m thinking primarily for fireworks and a few self-timer shots. Thanks!
Speaking of point and shoot, my kids will be just about 10 and 12 on our next visit in March and I was thinking of getting them each a Digital camera. Do you have any recommendations? I don’t want to invest a lot of $$$ in case they lose it but would like them to have something of their own. I would also like to find something that would be on the small/lightweight side since I will likely get stuck carrying the cameras along with my own camera. We will also have PhotoPass but I want my own shots as well.
Thanks a bunch!
If you provide me with a budget range, I can give you some options. I know you say you don’t want to spend a lot, but that’s somewhat relative. Some pick think $100 is a lot, others $500. If you’d rather contact me via email, feel free to do so at tom.bricker@gmail.com
Hope I can help!
Hi Tom,
I would like to stay under the $100 mark just in case they lose or break it, I won’t feel like it is such a huge loss. I see some at Wal Mart that are around the $75 amount but I want to be sure I get something that is easy for them to use and takes a decent pic. I know I am not going to get top quality at a budget price but at least decent.
Try: Samsung S860 (Amazon lists it for $105; you might be able to find it for less)
Canon PowerShot A470
Canon PowerShot A480 or A490 (either offered refurbished on eBay by Adorama camera for $75)
Panasonic Lumix DMC-FP8 (probably out of the range, but $150 on Amazon, down from $299)
Overall, most Canon Powershot and Panasonic Lumix cameras are generally good. Other brands are more spotty, in my opinion, with some models being good and some less-than-stellar. I would avoid all models of Kodak, Polaroid, and Digital Concepts cameras.
Thanks so much for the tips. I had Kodak and it was not my fave, I have a Cannon now. I am going to research the ones you suggested. Thanks again!
Nice post. And, hey, I like the ‘tip of the Castle’ comment! Great tips and I am going to put them to good use in WDW this December…force myself NOT to center all people-shots. 🙂
Great information! Glad to see some info I can use with my p&s camera.
great tips! do you carry a tripod with you in the parks? if so, can you recommended a brand/model that’s light and portable? Thanks!
Yes, I do carry a tripod. I now use a heavier DSLR, so I use a sturdier tripod (I still go lightweight). If you’re in the market for a DSLR tripod, I would recommend the Velbon Luxi L. If you’re in the market for a point & shoot tripod, I recommend the Velbon Maxi L. Honestly, though, with a P&S, as long as you get one that folds down to under 16″, expands to 55″ or more, and doesn’t weigh much, you’re fine (although you don’t want it to be so light it blows over in a breeze).
thank for the response!!