Foto Fridays: Disney Fall-tography
Much like Christmas, Fall in Walt Disney World is a bit of a misnomer. Unless you hail from the tropics, it’s still fairly hot, and unlike what most of us Northerners would associate with the true season. Well, at least the “real” environment is like that. Luckily for us, the parks are artificially transformed to convey that true Fall feeling. Bust out some hot cider and zombies, and you’ve got the complete effect! Since Walt Disney World has been “Zombie-free Since ‘93″ (odd slogan for a family-oriented theme park, but you have to admit that it’s catchy), you won’t have any luck photographing those, but here are some tips for photographing other things relating to the Fall in the parks, accompanied by my photo “tour” of Walt Disney World in the Fall.
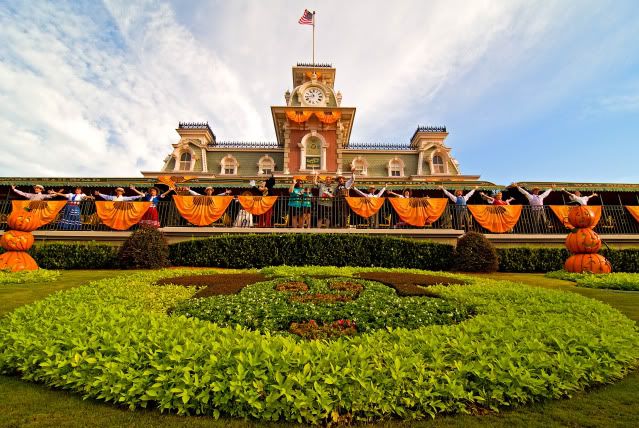
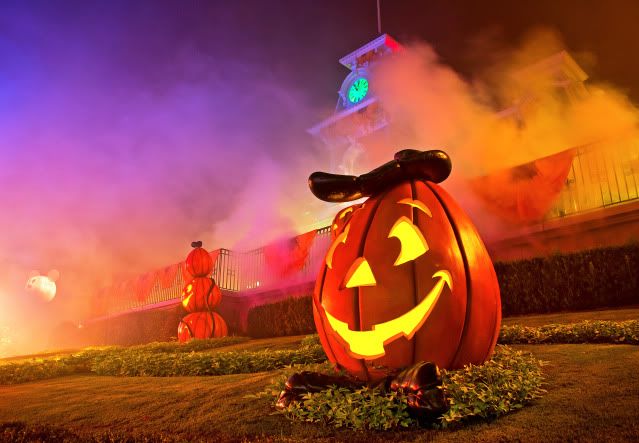
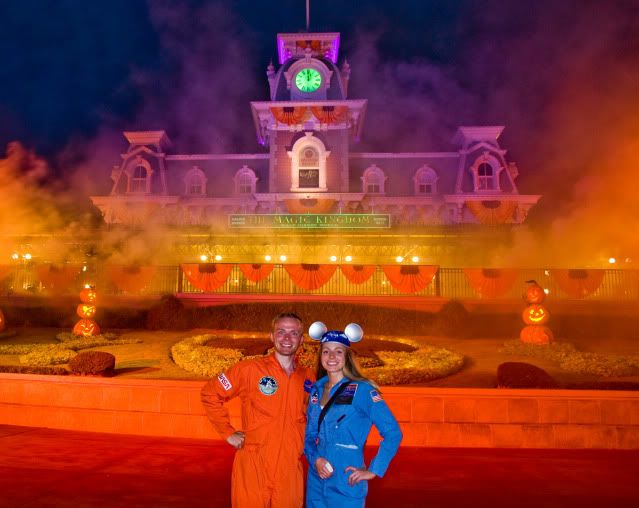
The beauty of Fall in the Magic Kingdom starts right after you pass through the turnstiles. The traditional Mickey flowerbed has been spruced up with some fall oranges, the train station itself has colorful banners up, and themed Disney pumpkins are scattered about in the area. If you arrive to this area during daylight hours, I think the best photo opportunity focuses on the flower bed. I used an ultra wide angle lens in the shot below to elongate and emphasize the bed, while also still drawing attention to the train station. The larger pumpkins (not pictured in this frame), while cool, were not the primary concern, as focusing on them makes it difficult to get an unobstructed shot of the bed. Don’t worry, though, we’ll get some good shots of these guys later.
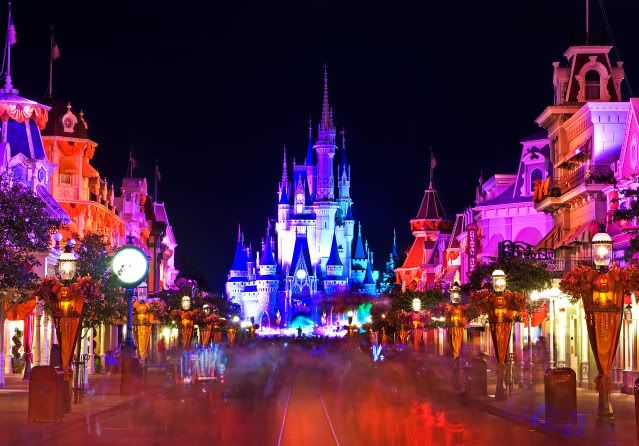
During the day and prior to the party, the good Fall shots in the Magic Kingdom are primarily on Main Street. Pumpkins and colorful banners line the streets, and these can make for interesting “details” shots. These are relatively simple to photograph, so I don’t think I need to belabor technique here. As far as the day goes, to the best of my knowledge, that’s about it.
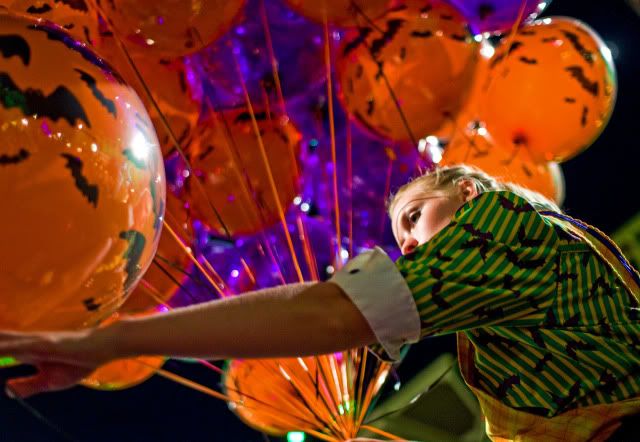
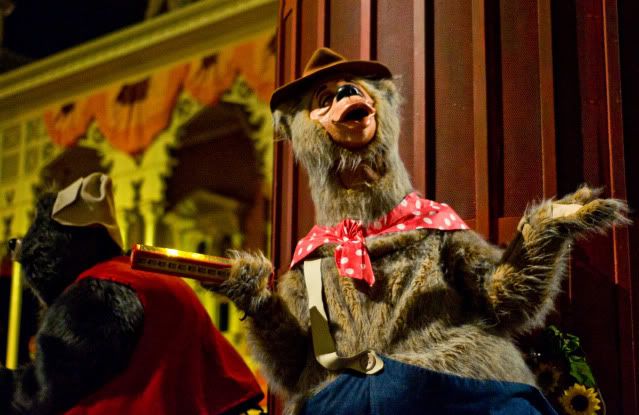
Things come alive once the Halloween party starts. In the past, decorations for this have been put up as early as 4 p.m. (when party guests are first allowed to enter using their party tickets), and these daylight hours prior to the party are a good time to take photos of the details, signs, and most especially, the crazy outfits worn by the Cast Members during the parties. I have no idea who designed these, but they’re pure genius. I occasionally wonder what the boss might think if I wore one to work on causal Friday. I mean, they are button-down, so I should be fine, right?
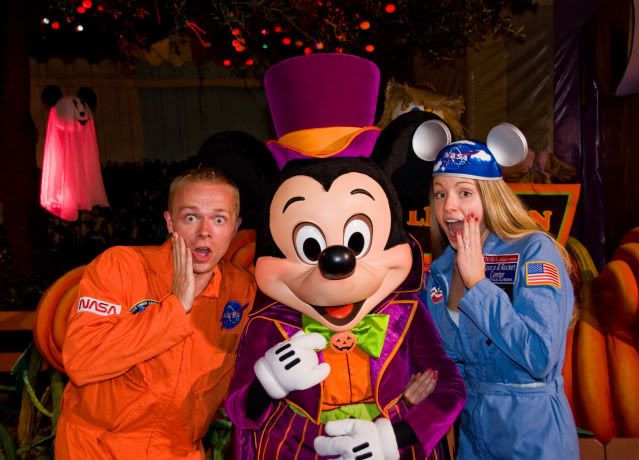
Once 7 p.m. rolls around, it’s time for character photos. As a matter of general strategy, I would advise party-attendees to queue up for Snow White and the Dwarfs around 6:30 p.m. if you want your photo taken with them. All night photos are going to be tough, and these are no different. My advice would be to use Rear Curtain flash (or just regular flash if your camera doesn’t allow for the distinction) a higher ISO, 400-800 ISO for a point & shoot or 800-1600 ISO for a DSLR; aperture of f/2.8-5.6; and, shutter speed of 1/25th of a second to 1/80th of a second depending on whether you’re handing the camera off to a PhotoPass photographer (which is perfectly permissible) or using it yourself to take pictures of the family. You might think that, since a PhotoPass photographer is a “professional,” they can handle the slower shutter speed; the converse is actually true. My experience has been that they’re in a hurry or don’t know you’re using a slow shutter speed, so they tend to not hold the camera as steady. These settings will allow some ambient light into the shot to fill in the background so it’s not just you and the character set against the black of night.
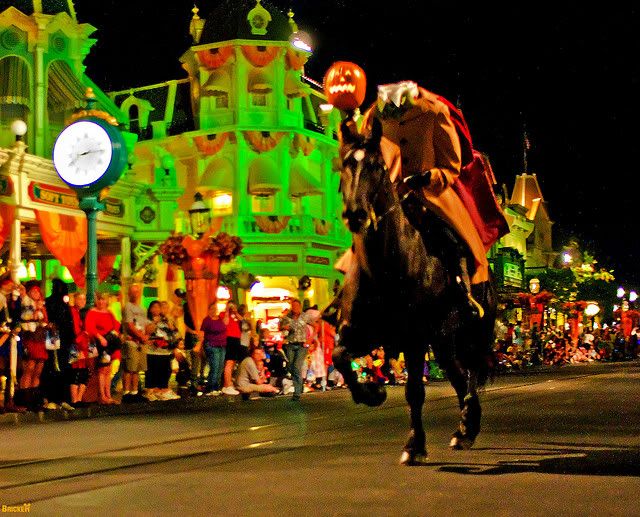
Next up is the parade. Another tough one; because the subjects move, you need a relatively fast shutter speed. Due to the fast shutter speed, you need a really wide open aperture and high ISO. While I typically hate the look of flash on parade floats, your equipment, especially if you’re using a point & shoot, may require that you use the flash.
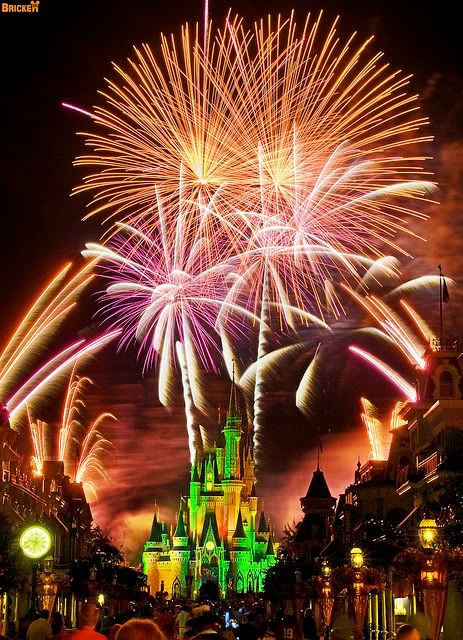
Conventional wisdom will tell you that you can’t shoot fireworks without a tripod and remote. However, my wisdom is neither conventional nor is it really that wise. Obviously, the best practice is to use these two devices, and if you have them, chances are you know how to use them so I’ll save the keystrokes. If you don’t have them, you’re going to be much more limited, but shots of HalloWishes! should still be possible. At least near the finale. If you have a camera that allows for manual control of settings, I would advise to set it to 400-800 ISO for a point & shoot or 800-1600 ISO for a DSLR; aperture of f/2.8-5.6; and, shutter speed of 1/15th of a second to 1/60th of a second depending on the steadiness of your hands. If using one of the ‘partial’ manual modes, I’d suggest shutter priority with the above shutter speeds. Whatever you do, turn off your flash, as using it to photograph fireworks won’t accomplish anything besides making you look a tad foolish.
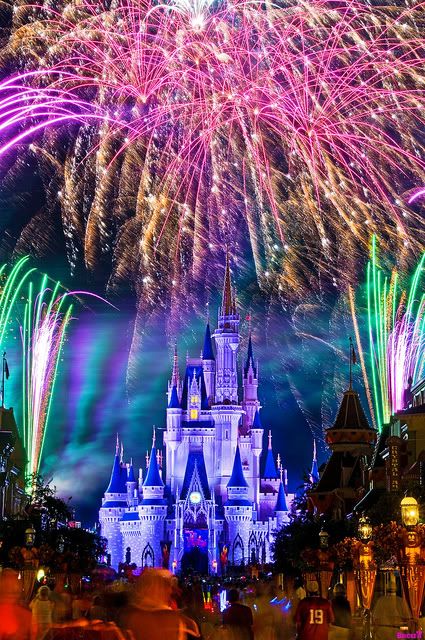
If you’re using a point & shoot that doesn’t allow for manual control, I would suggest that you avoid putting it in fireworks mode unless you have incredibly steady hands. This mode anticipates camera stabilization, and typically your hands cannot provide the requisite level for it to work. Instead, try “dusk” or “sundown” and hold that camera as stable as you can. With both of the above methods, you’re going to have the best results near the grand finale.
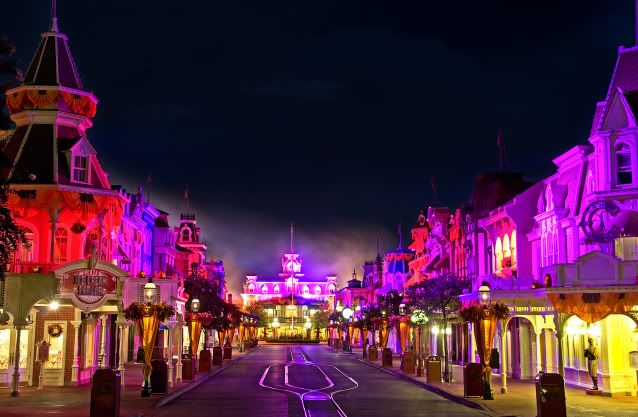
When the clock strikes midnight and the party concludes, rather than cramming into the Emporium to grab that super LE pin with the rest of the masses, grab one last shot of Main Street. The lighting is gorgeous and the effects chilling, so you don’t want to miss getting a shot of it. My experience has been that this is the single shot that conveys the mood of the party the best. I like to refer to Main Street as “Trash Can Alley.” This may sound a bit pejorative, but in the photography world it’s more a backhanded compliment. The point of that seemingly random piece of information is that trash cans provide the perfect stabilization device if you don’t have a tripod. Set your camera on one, enable the self timer (and do the “10 second self timer dash” if you want to be in the shot), and capture some wonderful shots. If you do this and you’re using one of the above point & shoot modes, you should use “night” for a static shot or “night portrait” for one with people in it.
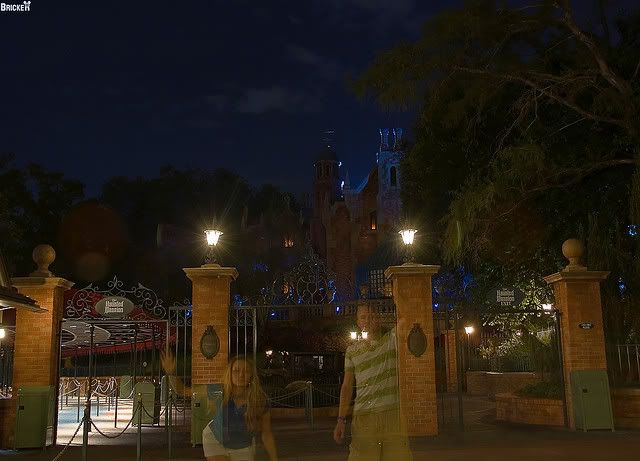
It’s been a long day in the Magic Kingdom, but it’s finally time to leave. Not so fast. If you have the mental agility and manual dexterity to operate a camera (hopefully your extreme sugar intake at the party doesn’t cause your hands to twitch!), now is the perfect time to stop at the Train Station again to get another shot. This time, the emphasis will be on the pumpkins. Again, you’re going to want to use a tripod. If you don’t have one, opt for a higher ISO and attempt to stabilize the camera on the ledge that abuts the grass containing the pumpkins and flower bed. Here is little trick if you don’t want to bring a tripod: bring a beanbag; it’s malleable-enough that you can manipulate it to angle the camera how you want, but sturdy enough that most point & shoot cameras won’t move (much) when you rest the camera on it. (If you do use this method, use the self timer as well.) Plus, it’s always great for those spontaneous games of Cornhole that (should) happen in Liberty Square. For this shot, I like taking an angle such as the one below, as I think it makes it more interesting.
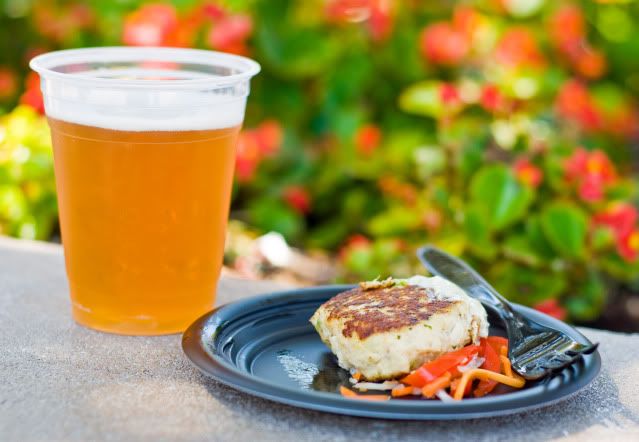
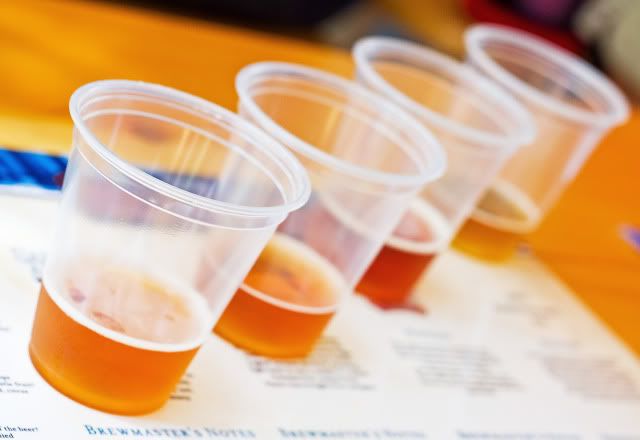
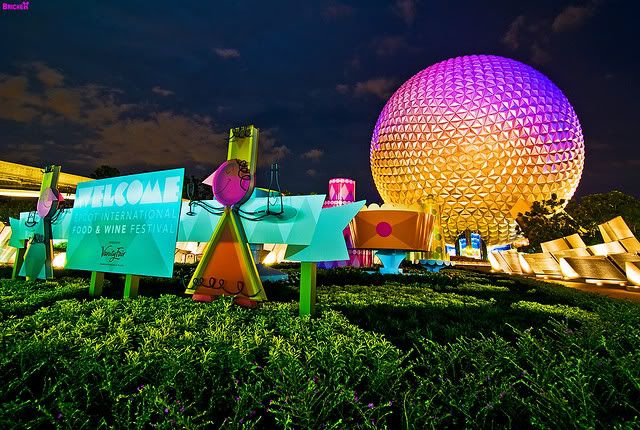
The only other park that specifically has anything “Disney Fall” related is EPCOT with its Food & Wine Festival. You might think this is a bit of a stretch since food isn’t really Fall per se, but this Festival is a “Disney Fall” staple just as much as MNSSHP, so I think it counts. I only really have a couple tips for this. The first tip relates to food shots; while I could write an entire article on this, I am going to attempt to heavily condense it. Use macro mode, move away a couple feet from the food, zoom in, and turn off the flash if you’re outdoors in good light. One of the biggest mistakes people make when photographing small things is to get as close as possible. This is fine, if you’re lens can focus this closely, but many cannot. So long as you can still get it fully in the frame with your optical zoom (don’t use digital zoom), you’re golden. I like to come at my food from interesting angles, but that’s all personal preferences.
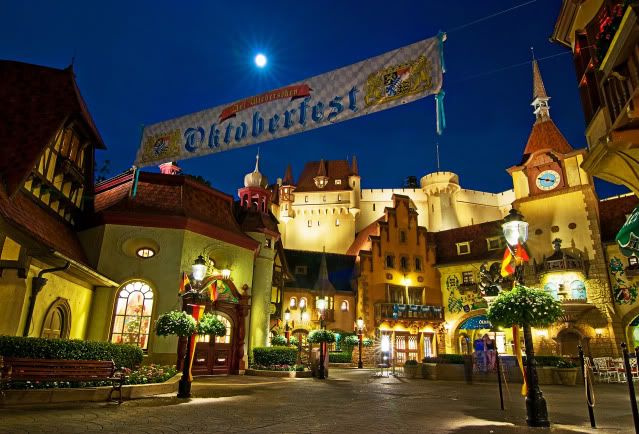
Second, get some interesting shots of the Food & Wine decorations out in front of SpaceShip Earth and in Germany for Octoberfest. These tend to change every year, and I think it’s sort of neat to preserve things like this for historical reference. Then again, I’m a huge dork (as you probably surmised by my knack for making incredibly corny jokes), so your mileage may vary. Apply the above tips when photographing these.
Hope you enjoyed this article! Many of these tips are intermediate-to-advanced level, so don’t fret if you can’t utilize them all. Use even some of them and you’ll be sure to have a ghost–or two–follow you home from WDW!
You May Also Like...
-

Oh, what a happy ray of sunshine I feel like I’ve been waiting months for! Today Disney Cruise Line has released…
-

Today, Disney just released the fall and winter dates for one of their more popular hard ticketed events - Disney After…
-

Disney Cruise Line has just announced that proof of COVID vaccination will no longer be required for guests sailing on the…
-

Disney Cruise Line has announced today that the debut of the new Disney Wish is being delayed by six weeks. Supply…
Amazing shots. What brand and model of camera did you use? Were these all taken with the same camera? I’m looking to upgrade from a mid-level p&s to a DSLR. The three I’m looking at are the Nikon D5000, D90 and Canon EOS Rebel T2i. Any suggestions would be greatly appreciated. Thanks for the great article.
Most of these pictures were taken with a Nikon D40 or Nikon D90. Any of the cameras you mentioned are very well regarded. I’m biased towards the D90, but I have heard great things about the T2i. The T1i is another great option if you don’t need the features of the T2i.
If money is no object, you might also consider the new Nikon D7000. It’s my next camera. 🙂
Hi Tom,
Great article and awesome tips! Looking forward to your Christmas Post! I do have one question when shooting Fireworks with a DSLR do you have a tip for when to “Time” your shot considering longer shutter speeds ? Thanks have a great weekend!
Charlie
Hi Charlie,
I use “bulb” mode when I shoot fireworks along with a remote. I also use a neutral density filter (we’re getting into Advanced Fireworks 402 with this stuff) so my exposures are often 60 seconds or more long. (E.g. http://www.flickr.com/photos/tombricker/4952023733/ ) Still, I like to open the shutter when I know a “scene” is about to start and close it after one ends. If you’re not familiar with these shows and really want to prepare, watch videos on YouTube–they’ve really helped me in the past.
Hope that helps!
Great post Tom, thanks. It will be helpful in preparation for my WDW trip coming up in ten days.
Thanks for reading! Hope you have a great trip–bring back plenty of photos!
I was looking all over for this exact info. Thanks.
We will be at MK in October, but won’t be there for the party. Will there be ANY nighttime Halloweenish lights then? or will we miss everything? I’m thinking on the buildings of Main Street and the Castle in particular.
Thanks.
I could be wrong on this, but my recollection is that there are no *lights* on for non-party nights. If time and resources allow, I would strongly encourage you to attend the party. It is, in my opinion, definitely worth the money to attend at least once, even with the steep price. It’s really, really well done!
Really wonderful article! Makes me want to explore all the functions on my camera so much more.
Even the most basic of point and shoot cameras can really do a lot in the right hands. I’m sure you could see some great results if do explore those functions! Good luck! 🙂
I’m really enjoying these instructional posts, Tom. Hopefully pictures from my upcoming trip will reflect some of the things I’ve learned! Do your party/nighttime tips also apply to MVMCP? I would think that they would, but don’t want to assume.
57 days to go!
For the most part, these tips will apply to MVMCP as well. However, I will be writing an exhaustive post for photographing the parks during the Christmas season prior to your trip in 57 days; I will likely post it the day after Thanksgiving as that is the day that most of Disney begins celebrating Christmas (besides a few MVMCPs that are prior to Thanksgiving), so it’s probably good timing for most readers, especially those of us heading off to Reunion the following weekend!
It will cover all of the obvious things (Castle Dream Lights, Osborne Lights, Santas, Candlelight Processional), but let me know if there’s anything in particular you, or anyone reading this, would like to see covered!
We are heading to MVMCP on 12/5 and are looking forward to your tips and tricks post! Loving your blog.
Tom,
Really amazing photos. Started my Friday off right.
Thanks! Glad you enjoyed them. Have a great weekend!