
Baymax Hat Tutorial and Giveaway
Have you ever considered what it might be like walking around a Disney theme park looking like a personal healthcare companion who sometimes moonlights as a superhero? No? Well maybe you should!
Today I’m bringing you a Baymax Hat Tutorial for your very own Big Hero 6 Baymax armor hat. If you caught my tutorial on custom Mickey ears then you know I’m a sucker for wearable Disney crafts. However, this Baymax hat tutorial can be just a smidge more appealing than undertaking the full custom Mickey ears. First, this tutorial is a snap. There is no sewing involved – just a little bit of cutting and hot gluing and you’ll be in business. Second, the great thing about this hat is that it is 100% unisex. Don’t get me wrong, I’m all for guys wearing Mickey ear headbands, but some guys might not want to go that route. This gives them an opportunity to participate in some light DisneyBounding while also keeping the sun off their faces.
Do you feel like maybe your crafting skills aren’t up to snuff to make your own Baymax hat? No problem! Read through to the end of the post for how you can enter to win the exact Baymax hat I constructed for this tutorial!
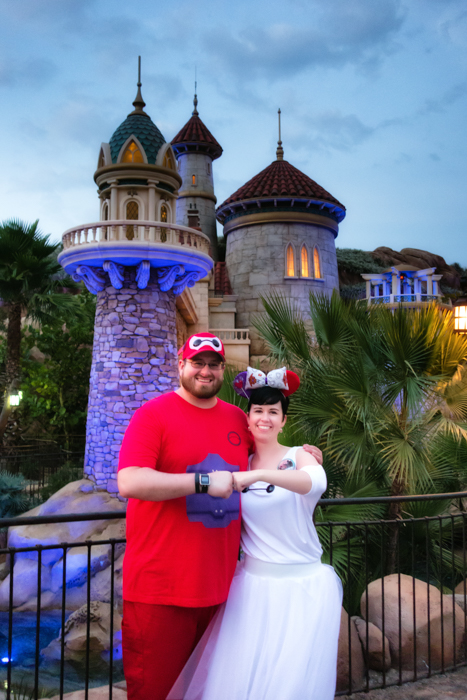
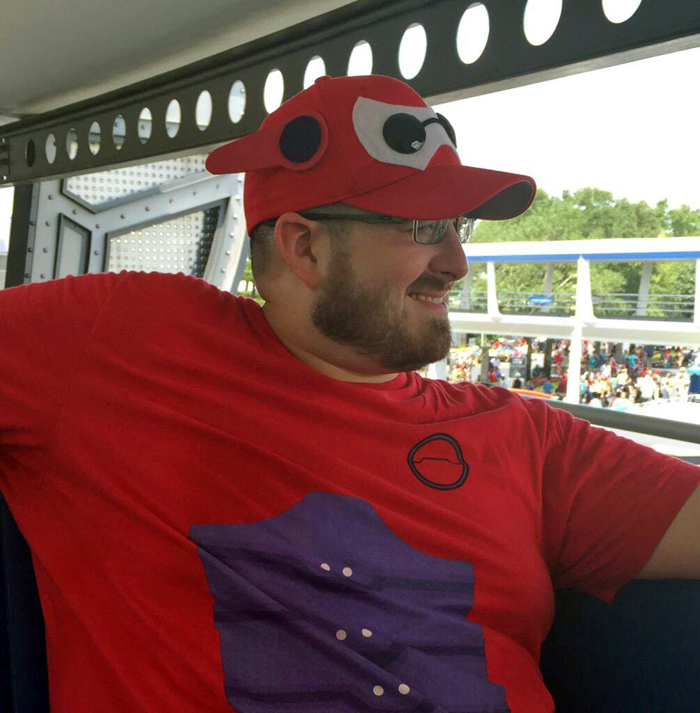
Let me start out by giving you a little background on this particular hat. My husband and I visited Disney World over the 2015 Memorial Day weekend, which provided us with an opportunity to participate in the 24-hour party at Magic Kingdom. (And this party encouraged costumes. Enough said.) Anyway, Anthony decided he wanted to go as armored Baymax. He had it all figured out, but he needed just one teeny, tiny thing from me. He needed a hat. He knew what he wanted it to look like, but to his dismay no one else had thought of the need for this piece of head-wear, and it didn’t exist on Amazon or Etsy. A little bit of brainstorming and the end result was the fantastic Baymax hat you see here! (Yes, I also decided to attend the party as Baymax. Healthcare Baymax. Because I thought it was adorable. Is any other reason needed?)
Even though I designed and created this hat, I have to admit that I have just a little bit of bitterness towards this dashing head-wear. Why? Well every time Anthony wears it at Disney World he gets a ridiculous amount of awesome comments on it. High fives, thumbs up; one person even asked him if she could have it. (Straight out asked for it – weird, right?) You might be asking yourselves why on earth positive feedback on something I designed is cause for jealousy. Well, the truth of it is that no matter how much time I put into making amazing custom Mickey ears, I never get the accolades he gets for a hat that took less than an hour to throw together. Let’s give the man some credit though – his immediate response is always, “She made it!” as he points frantically at me.
Okay, okay; I’ll stop rambling and get on with the show.
Baymax Hat Tutorial
Materials needed:

- Baymax hat pattern pieces
- Red hat (I like this one from Amazon and it comes in a variety of sizes)
- Small piece of white felt (you can buy small sheets of felt at Joann Fabrics)
- Small piece of purple felt or craft foam
- 3mm red foam sheet (also available at Joann’s)
- Two large black buttons for eyes (I LOVE LaMode Style 20974 for this – Joann’s doesn’t have them online, but you can check a store near you. I also found them here, but I’ve never purchased from this shop before.)
- Approximately 3.5 inches of black cording
- Scissors
- Hot glue gun
- Marking utensil
- Wire cutters or other implement (to remove the loops from the back of the buttons)
1) Download the Baymax hat pattern pieces and print them at “actual size.” If you print on card stock they’ll be a bit sturdier, but that certainly isn’t a requirement. Cut out each of the three pattern pieces.
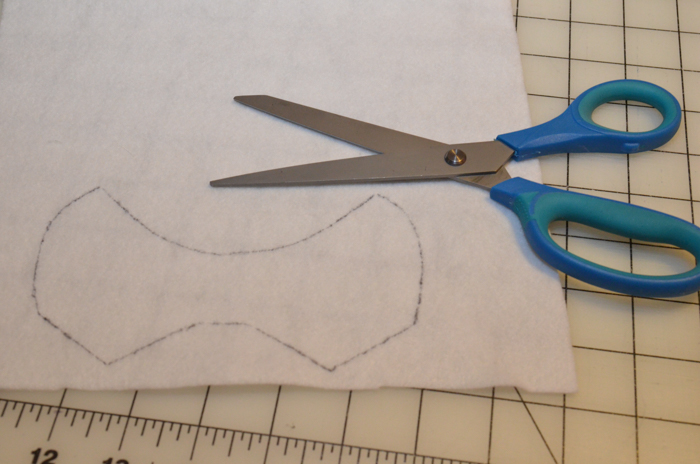
2) Trace the pattern piece marked “white felt” onto your white felt and cut it out.
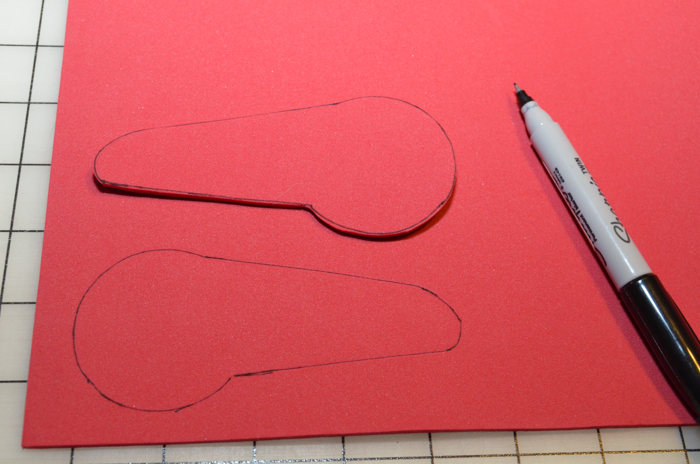
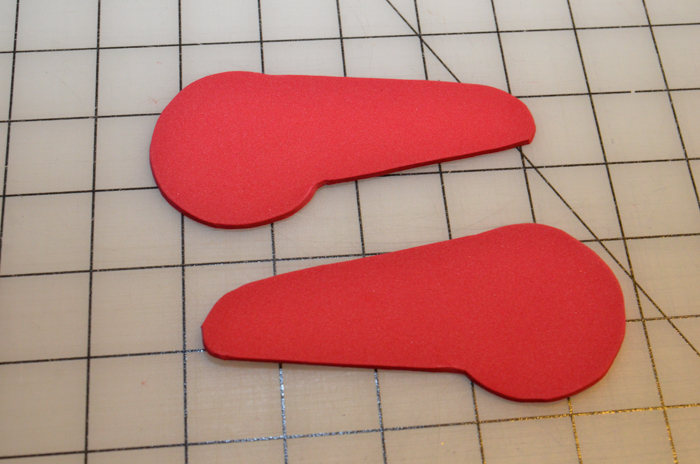
3) Next you’ll trace your red foam piece onto the foam twice, but be very careful with how you do this. You’ll want to have the wing flipped in one direction for one of the tracings and then flipped the other way for the second. (See the photo below.) This is so you’ll be able to turn the marked side to the inside on both sides of the hat. I used a thin point sharpie to mark these, but you may want to use a pencil or a lighter colored marking utensil. It isn’t a big deal, but on the backside of the wings you can see some of the outline if you’re looking for it. (I’m OCD enough that it bugs me.)
4) Now take your small circle pattern piece that is marked for the purple felt or foam (I like using felt, but you could use foam if you wanted) and trace it onto the fabric. You don’t have to worry about how much your markings are seen with this one, as that side will be glued to the red wing.

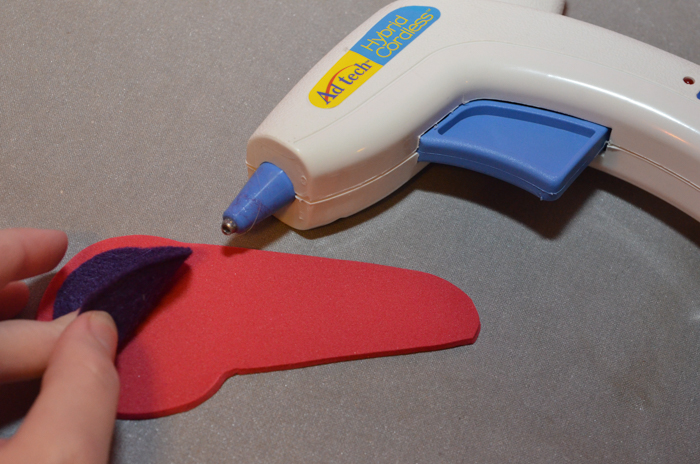
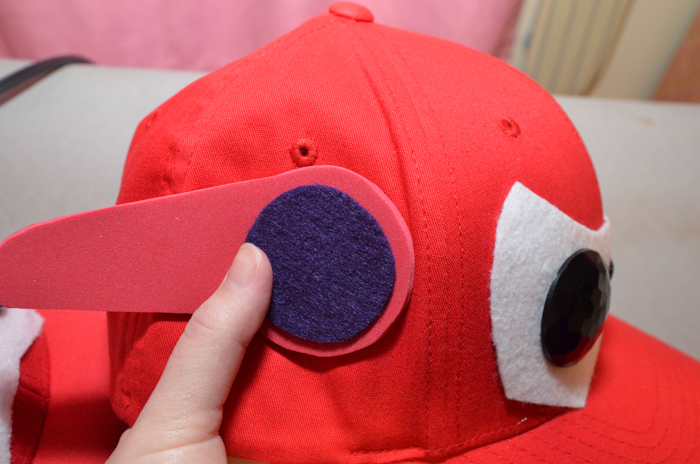
5) Time to attach the purple circles to the red wings. Simply line them up as you can see below and use your hot glue gun to attach them. Make sure you have two wings facing opposite directions with the markings on the side that you aren’t gluing the felt to.

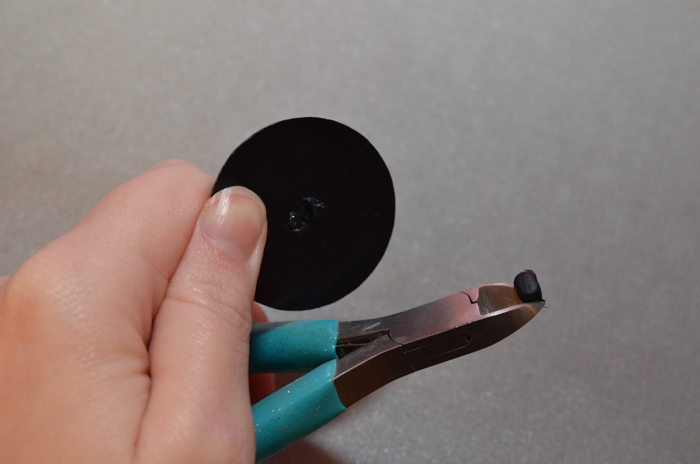
6) The next step is to attack those buttons. The buttons will lay much flatter on the hat if you remove the plastic loops from the back of them. I cut them off using some jewelry-making wire cutters, but you may have something more appropriate to use. Just make sure you’re careful when you remove them!


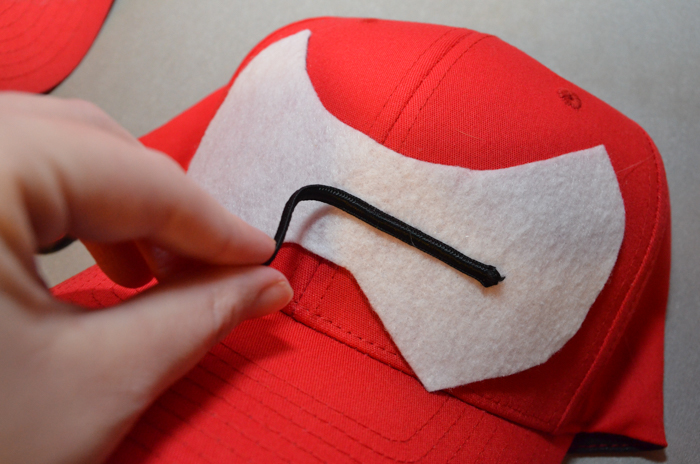
7) For the black line between Baymax’s eyes, I use a black cording that is relatively flat – it makes it easier to glue down. Cut approximately 3.5 inches of the black cording for your hat.

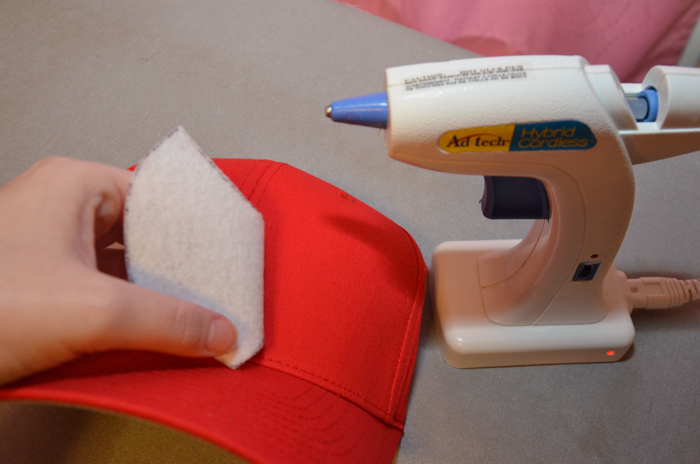
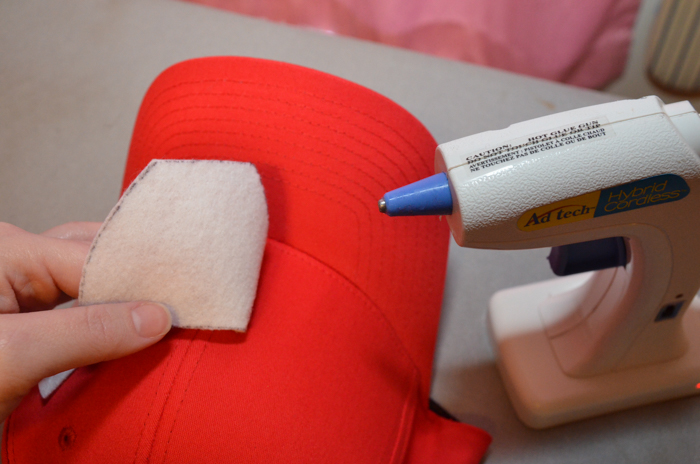
8) All of your pieces are ready, so it’s time to put this bad boy together! Start with the white felt and center it on the front of the hat. The white points at the bottom should just touch the bill of the hat. Use the center hat seam to help with placement. Luckily, felt is sticky enough that you can move some of it around without having the rest of it shift out of place. Flip one side of the white felt up so you can hot glue it to the hat. Starting in the center of the hat, place the glue on the felt, getting close to the edge, but not so close that the glue will squeeze out to the front when you push the felt down. You’ll have to do this pretty quickly so the glue doesn’t dry before you get the felt attached, but don’t rush so much that you burn yourself. Once one side has been attached you can pull up the felt on the other side and attach it.

9) The next step is to glue on the cording, but I find that it is helpful to lay the buttons on the hat first, so I can see where the cording will need to go. Then, placement of the cording is simple – you just need to make sure the ends of the cords won’t poke out from the far sides of the buttons. (You’ll want approximately 2 inches between the eyes, which, if you use this particular hat, means you can measure out one inch from the center seam on each side to place the buttons.) Just like with the white felt, you’ll want to glue one side of the cording on at a time, starting at the center. Because the cording is so thin and you don’t want hot glue clumped all over the front of your hat, the best thing to do is to place tiny dots of hot glue along the cord. Do this one at a time so the pattern is: hot glue dot, push cord down, hot glue dot, push cord down… If you try to do multiple dots before pushing the cord into the felt, the dots of glue will dry before you get a chance to adhere the cord. Once you’ve gone in one direction, do the same thing for the cord in the other.

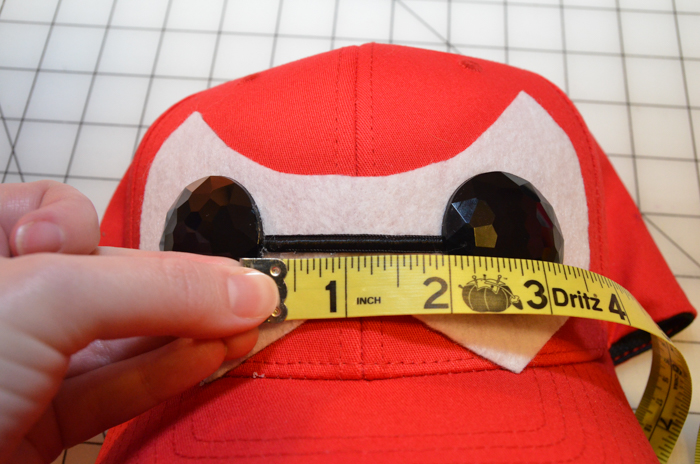
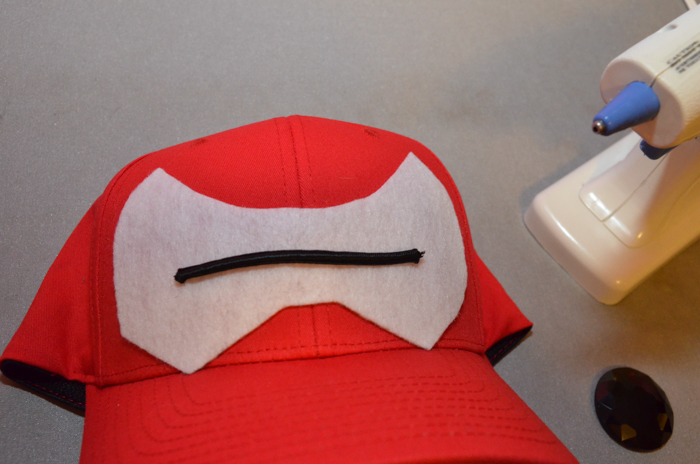
10) Now it’s time to give Baymax his sight! Having used the buttons to place the cording, it should be a snap to line them up where they need to be. It takes a fair amount of hot glue to attach these buttons, so make sure you’re ready to attach them as speedily as possible once the glue is on them.

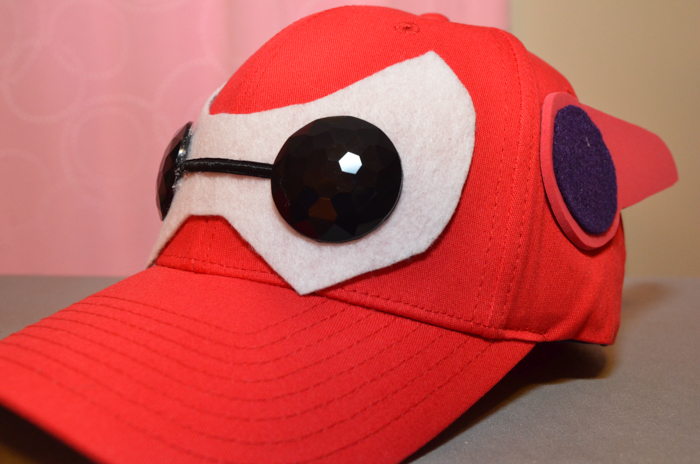
11) All that’s left is to attach Baymax’s wings. Again, using this particular hat is super helpful because you can use its structure as placement guides for the wings. Do you see the seam running down the hat closest to his white mask? Push the edge of the wing up against this seam and the top of the wing against the eyelet, keeping the top edge of the wing parallel to the ground. If you do this on both sides you’ll have perfectly even wings! Make sure you check the wings against the positioning in the picture below to make sure you’ve got them oriented correctly. Then place a fair amount of hot glue on the entire circular part of the wings (don’t go too far down the body of the wings or they won’t lie correctly when the hat is on) and glue them into their respective places.
And just like that you’ve got your very own armored Baymax hat! Wearing this, you could easily take on all the villains roaming the streets of San Fransokyo (or, you know, Disney World). Just make sure you’re prepared for looks of admiration from everyone around you!
Okay, now the part I’m sure many of you have been waiting for – the giveaway! You have two ways to enter (and if you enter both ways, you get two chances to win). First, there is a special tweet from the Touring Plans twitter account: Retweet it! Second, share the special Touring Plans post on Facebook. We’ll draw the winner one week after the article is posted, so make sure you tell your family and friends to RT and share for their chances to win! The prize itself is the Baymax hat featured here. The size of this hat is S-M, which is the same size as the one I created for my husband (don’t be fooled by Anthony’s Gaston-like physique – he has a pretty small head). I somehow managed to time this article to coincide with our December trip to Disney World, so please keep in mind that the hat will be mailed to winner after we return, which will be the week of Christmas.
Make sure you follow me on Twitter @Angela_Wilhelm if you want to see more of my Disney crafts and adventures in the Disney parks!
You May Also Like...
-

Perhaps it is in synergy with Disney+, but for whatever reason Disney has been creating a lot of Pixar-themed merchandise lately.…
-

If you know the perfect Disney parents, or see yourselves as such, you'll want to head to Magic Kingdom to pick…
-

Sometimes it is fun to just take it all in while you're at Walt Disney World. Recently, we spent an afternoon…
-

Our team is in the parks every day to keep up to date on everything exciting and amazing in the world…